JavaScript and HTML/CSS Unraveled: ChatGPT as Your Front-End Companion

Written by Archana Vaidheeswaran

Welcome back to our exciting journey into the tech world with ChatGPT. If you’re joining us for the first time, we’re currently building a weather forecasting app, using ChatGPT as our learning companion. In the first blog, we dipped our toes into the Python programming language and laid a solid foundation for our weather forecasting app.
Today, we will take our next big step: designing the front end of our application with HTML, CSS, and JavaScript. This is where our app will come to life visually, creating the interface users interact with.
In this blog, you’ll:
-
Learn about HTML, CSS, and JavaScript — the pillars of front-end web development
-
Apply these concepts to craft an attractive, interactive interface for our weather forecasting app
-
Get acquainted with troubleshooting common front-end issues using ChatGPT
Remember, the aim here isn’t to have ChatGPT do the work for you, but to assist you in understanding concepts, solving problems, and offering guidance when you’re stuck.
So, let’s get started!
HTML, CSS, and JavaScript: The Holy Trinity of Web Development
HTML (HyperText Markup Language), CSS (Cascading Style Sheets), and JavaScript form the bedrock of web development. HTML is the structure, CSS adds beauty, and JavaScript makes everything interactive. Together, they create a user experience that’s dynamic, engaging, and responsive.
Crafting HTML Structure with ChatGPT
Think of HTML as the skeleton of your web page. It forms the foundation, defining the page’s structure and content.
Let’s start crafting our weather app’s front-end. We want to display the city name and weather forecast on our page. You can start a learning session with ChatGPT like this:
User: How can I use HTML to display the city’s name and its weather forecast on my page?
ChatGPT might then guide you to create an HTML structure like this:
Code:
<div>
<h1 id=”city-name”></h1>
<p id=”weather-forecast”></p>
</div>
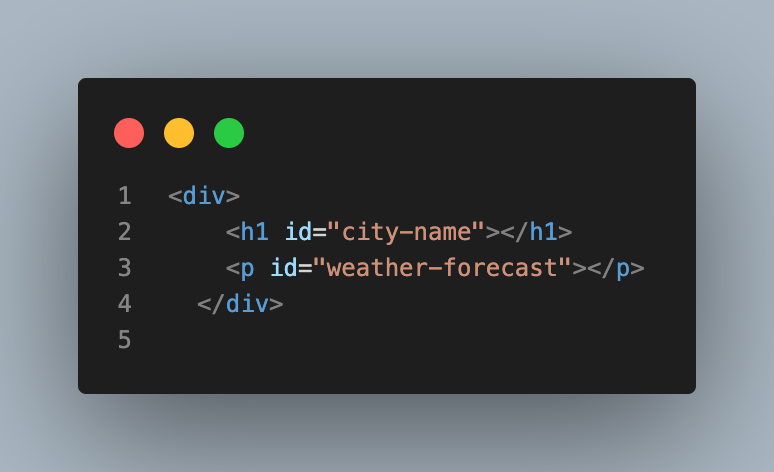
In this code, we’ve created a div to contain our elements. The h1 element will display the city name, and the p element will present the forecast.
Adding Color with CSS and ChatGPT
CSS is the artist of our web page. It adds colors, fonts, and layouts to our HTML structure, making the page aesthetically pleasing.
Let’s see how ChatGPT can help us beautify our weather app. We want to give our city name and forecast an appealing look:
User: How can I use CSS to style the city name and weather forecast to make them look visually appealing?
ChatGPT may then guide you to add styles like this:
Code:
#city-name {
font-size: 2em;
color: navy;
text-align: center;
}
#weather-forecast {
font-size: 1.5em;
color: darkslategray;
text-align: center;
}

In this code, we’re centering the text, changing colors, and adjusting the size of the font to make our app look more appealing.
Bringing It to Life with JavaScript and ChatGPT
JavaScript is like the puppet master, pulling the strings to make our web page interactive. We can use it to update the city name and weather data dynamically.
Let’s get ChatGPT’s assistance again:
User: How can I dynamically use JavaScript to display the city name and weather forecast on my web page?
ChatGPT might suggest a JavaScript function like this:
Code:
function updateWeather(city, forecast) {
document.getElementById(‘city-name’).textContent = city;
document.getElementById(‘weather-forecast’).textContent = forecast;
}

Overcoming Front-End Hurdles with ChatGPT
Coding is a journey with its own challenges and hurdles. Perhaps your CSS isn’t rendering as expected, or your JavaScript function isn’t updating the HTML elements. Don’t fret! Remember, you’ve got a smart companion in ChatGPT.
Let’s say our updateWeather JavaScript function isn’t updating the weather forecast on the page. Ask ChatGPT for help:
User: My JavaScript function updateWeather isn’t updating the weather forecast on the web page. What could be the problem, and how can I solve it?
ChatGPT can then assist in debugging, helping you understand potential issues and their solutions.
Our Progress So Far
Let’s take a look at how far we’ve come. We began our journey with Python, building the logic for our weather forecasting app. We’ve created an attractive front end using HTML, CSS, and JavaScript. Our app can currently display a city’s name and its forecasted weather.
Here’s what our current code looks like:
Code:
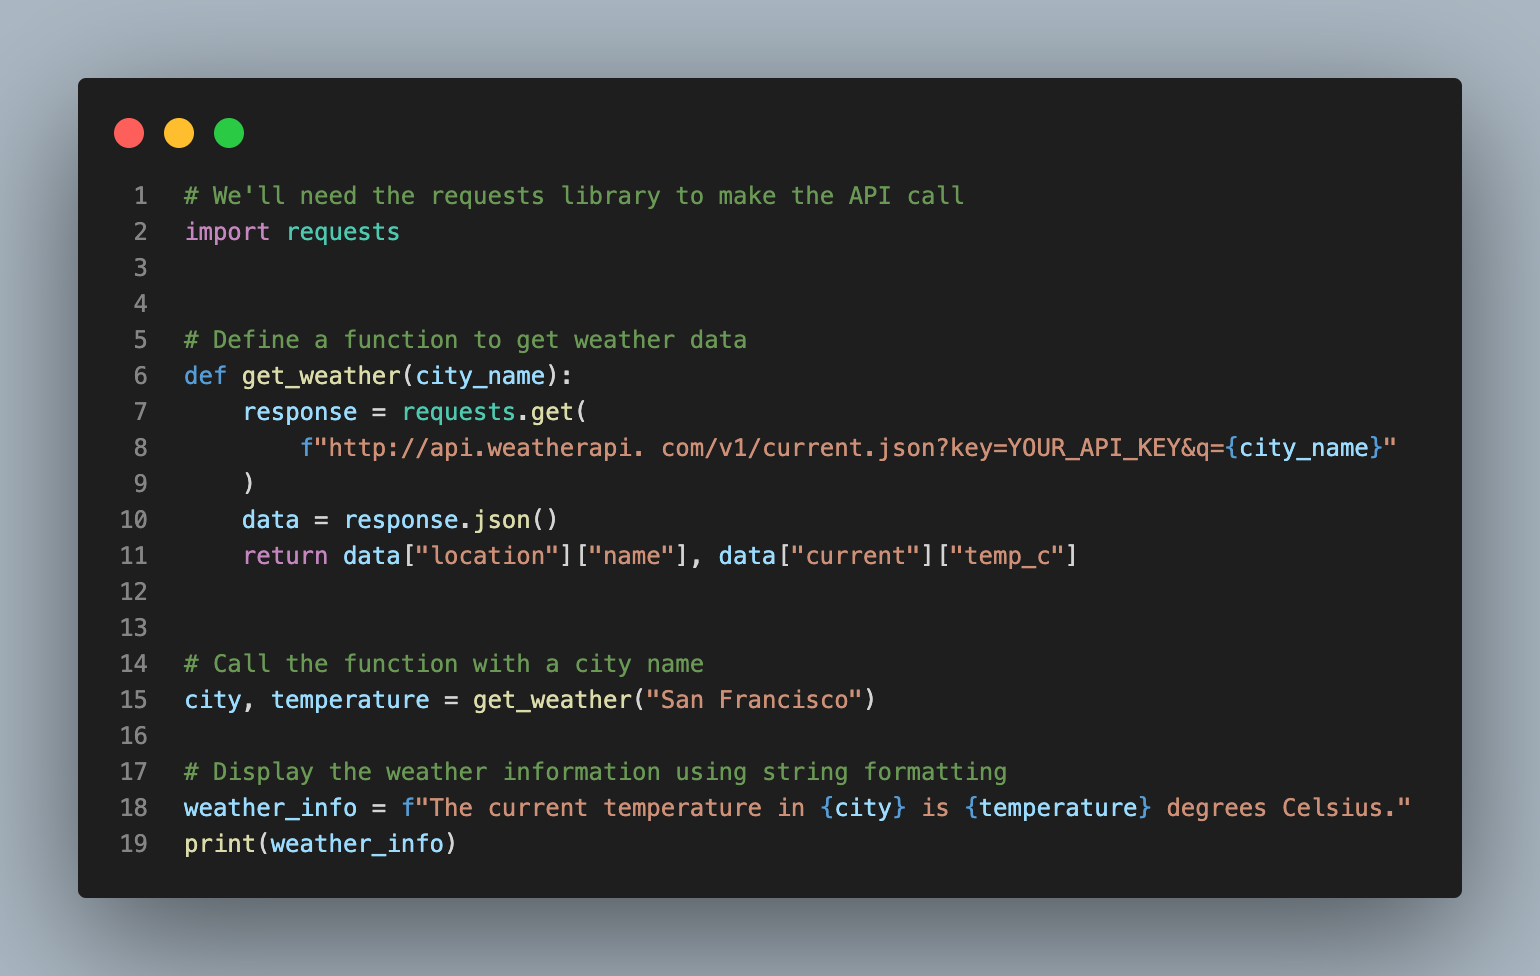
import requests
def get_weather(city_name):
response = requests.get(f’http://api.weatherapi.com/v 1/current.json?key=YOUR_API_KEY&q={city_name}’)
data = response.json()
return data[‘location’][‘name’], data[‘current’][‘temp_c’]
Python – Backend
HTML – Frontend
Code:
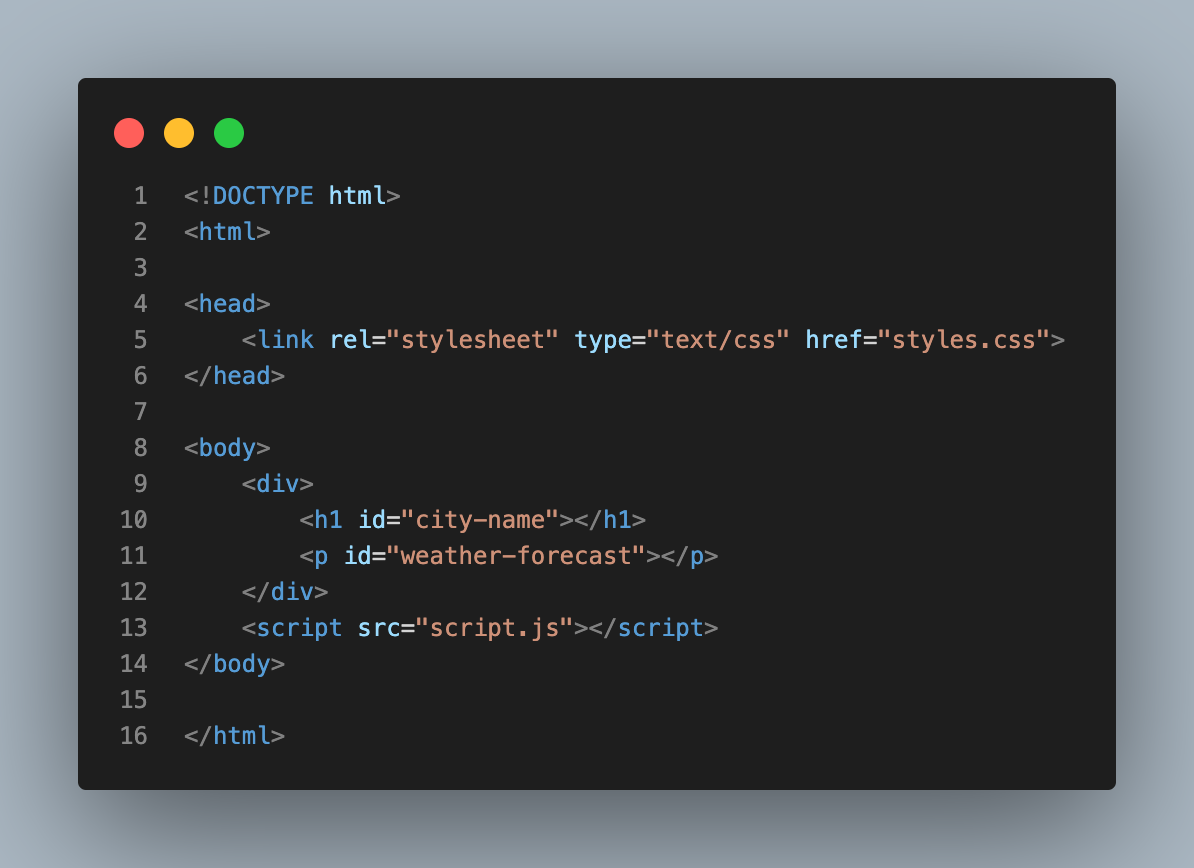
<!DOCTYPE html>
<html>
<head>
<link rel=”stylesheet” type=”text/css” href=”styles.css”>
</head>
<body>
<div>
<h1 id=”city-name”></h1>
<p id=”weather-forecast”></p>
</div>
<script src=”script.js”></script>
</body>
</html>
CSS – Styling

Code:
#city-name {
font-size: 2em;
color: navy;
text-align: center;
}
#weather-forecast {
font-size: 1.5em;
color: darkslategray;
text-align: center;
}
JavaScript – Interaction

Currently, the JavaScript function ‘updateWeather’ needs to be manually called with city and forecast data. It doesn’t yet interact with our Python script, which fetches this data. This is an area where we’ll be progressing in our future blogs.
Need Help?
Web development can sometimes feel like magic, with HTML, CSS, and JavaScript as your spells. Visit our /frontend directory in the repository to see this magic at work. index.html, styles.css, and script.js await your exploration.
If you need any help or advice, I’m just a click away.
Wrapping Up and Looking Ahead
We’ve reached the end of the second chapter in our coding journey with ChatGPT, but this is just the beginning. As we wrap up this blog, remember to take a moment and appreciate how far you’ve come. From understanding programming basics with Python to designing and implementing the front end of a web application, you’ve made tremendous progress.
We’re missing a key feature: integrating our front end with the Python script to dynamically fetch and display weather data. We’ll continue building our weather forecasting app in our upcoming blogs, adding exciting features and exploring new technologies like data science and cloud computing. We’ll continue leveraging ChatGPT as a learning tool to guide us through these advanced topics. We’ll also look at how we can apply these skills in real-world situations to create impactful applications.
ChatGPT is more than just an AI – it’s a teacher, mentor, and guide. It’s a tool that can help you build your tech career, regardless of your current skill level. As we continue our journey with ChatGPT, always be ready to learn, adapt, and grow.
So, keep coding, stay curious, and look forward to our next encounter, where we’ll dive deeper into the world of data science and learn how it plays a pivotal role in our weather forecasting app. Until then, happy coding!
Full Series
Series 1: A Learning Journey with ChatGPT: Python Basics Decoded
Series 2: JavaScript and HTML/CSS Unraveled: ChatGPT as Your Front-End Companion
Series 3: The Data Science Journey with ChatGPT: The Perfect Pair for Beginners
Series 4: Reaching for the Clouds: Mastering Cloud Computing with ChatGPT
Series 5: Maximizing Your Tech Potential: Embrace Learning, Build Connections, and Elevate Your Career with ChatGPT